Friday, April 30, 2010

Wild Rice w/ Chicken, Asparagus, Pecans & Maple Dijon Dressing

Whew!! It is a lot of work to pack everything you own into boxes and cart it from the basement of one house to the 3rd floor of another house across town! And I haven't even gotten past carrying it all out of the basement yet. I can't believe that in the not so distant past, I actually did this almost every 9 months for 6 years! It has been an incredible blessing to actually have stayed put in my current home for the last 3 years. Despite the fact that I am really excited about my new place (living alone, downtown, pretty street w/ great big trees, only 5 minutes from work, etc) I don't like moving and I feel some sadness over the ending this past season in this house. Tomorrow is the big day and about 20 minutes ago, after an hour of carrying boxes up the stairs, and loading up my car for the first trip tomorrow morning, I got overwhelmed and emotional and decided to be done for tonight. I am now cozy in my bed with a glass of red wine, trying to pull myself together.

And what better way to do that then to tell you about my lunch from this past week?

I know... I'm rather strange. But I really enjoy writing this blog and it will serve to get my mind off of the incredible pile of boxes at the top of my stairs that will be making a trip across town tomorrow with my furniture following close behind.

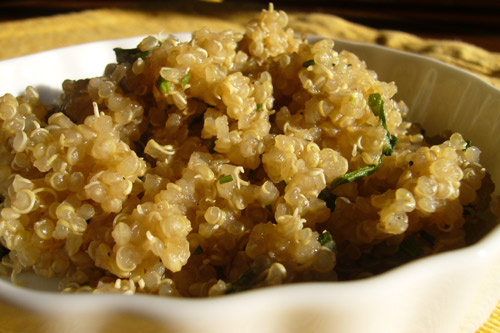
A few weeks ago, I got to have lunch and visit with my good friend, Kate. Along with being just a beautiful, kind, Godly woman, she is one of the best cooks that I know! For lunch she made us a salad of sorts with wild rice, chicken, asparagus and pecans and this really yummy dressing that you drizzle over the top. Of course, I needed the recipe and I whipped up a batch and ate it for my lunches this past week. In addition to being really delicious, a dish like this is healthy and covers all your food groups (starch, veggie, protein) in one dish.

Hope you enjoy it!

Wild Rice w/ Chicken, Asparagus, Pecans & Maple Dijon Dressing

(Kate, is there an "official" name to this dish? I just called it by all the main ingredients, but it feels really long!)

1 cup uncooked wild rice (prepared according to package directions)
1 bunch asparagus, cut into 1 inch pieces & parboiled (meaning you put them into boiling water for about 3 minutes and then transfer them directly to a bowl of ice water to stop the cooking process)
2 large, boneless, skinless chicken breasts (cooked to your preference: grilled, roasted, baked, etc)
pecans (raw or toasted)

Dressing:
3 T apple cider vinegar
1 tsp pepper
1 T dijon mustard
1/3 c pure maple syrup
1/2 c. olive oil
about 1/3 cup diced onion (you can use more or less to taste)

- I was up at my parents' house last weekend and had my dad cook my chicken breasts on his smoker, which was wonderful. Kate told me that she sometimes marinates them in some lemon juice and olive oil. But plain, cooked chicken would be good as well!
- Toss the cooked rice, asparagus & chicken together. Add nuts right before serving.
- Mix dressing ingredients in a jar and give it a good shake.
- Drizzle dressing over rice right before serving. If you add it all at once, the rice will soak it up and you will lose the flavor. So i just kept it in a jar and added some each time I ate the meal.


* By the way, Kate is also BRILLIANT with sewing and card-making and all things crafty and she recently started her own Etsy store. If you have any interest in looking at the stuff she makes, you can view it at: www.ohwrite.etsy.com

Tuesday, April 27, 2010

Scrumptious...

Need I say more?


(P.S. By the way, since a few of you have asked me... Yes, I did buy him this shirt. But in my defense, I knew that deep down in his little baby heart, it was truly how he felt so I was just helping him give expression to his thoughts while he is still pre-verbal.)

Monday, April 26, 2010

Easy, Fresh, Fruit Tart

If you haven't already picked up on this by now, I should probably tell you that I am an extremely tactile person! I get a ridiculous amount of enjoyment from things that look pretty, feel soft, smell good, etc. As a kid, I used to like to walk barefoot in the garden after I watered it because I liked the feel of mud squishing between my toes! My mom once scolded me soundly when she found a collection of crayon shavings hidden in my closet. I had been keeping them because I thought all the colors looked pretty. My little cutie-pie niece seems to be similar to her (adoring) Auntie in this. Last Christmas the ladies in my family (big and little) did a little after-Christmas shopping. We were standing in line at a store that had some CDs by the cash register. I was watching Bekah touch the shiny plastic with her fingers and filling up with wonder over the way little kids are so sensory when she then picked up the CD and started rubbing it on her cheek. That made me laugh out loud. I knew exactly what she was doing! I have done the same thing on many occasions. If something feels soft or interesting under your fingers, it will feel 10 times more so if you rub it against your cheek!

Anyway, I digress...

I made a dessert this morning for a work party that made my sensory receptors buzz and sing for joy: Looks colorful & pretty, feels nice in my mouth and tastes completely YUMMY! It is a recipe for a fruit tart that my mom found years ago. I have requested it for my birthday dessert for several years in a row now. My family is pretty healthy and we typically eat normal serving sizes. However, I will confess that just my mom and dad and I will often eat this entire dessert in one day!

Here you go:

Easy, Fresh, Fruit Tart

Heat oven to 375 degrees

2 cups Bisquick baking mix
1/3 cup sugar
1/3 cup softened (almost melted) butter
1 egg

1 pkg (8 oz.) cream cheese, softened
1/2 cup sugar
2 tsp. vanilla
dash of almond extract
¾ cup whipping cream (or 1/2 carton of Cool Whip)

Assorted fresh fruits
½ cup apple jelly, melted

- Grease cookie sheet; dust with baking mix.
- Mix baking mix and 1/3 cup sugar.
- Mix in softened butter until crumbly
- Mix in egg until dough forms.
- Pat dough into 12x10” rectangle on cookie sheet (Dough will stick to fingers; keep either flour handy to coat fingers or shortening to keep fingers greasy.)
- Bake 10-12 minutes or until edges just begin to brown. Cool completely.
- Beat cream cheese, 1/3 cup sugar and the vanilla in small bowl on low speed until smooth.
- Beat in whipping cream on medium speed until stiff peaks form. If you use Cool Whip, then just fold in 1/2 carton.
- Spread over crust to within ¼” of rim.
- Arrange fruits decoratively on top
- Brush with melted jelly.
- Refrigerate at least 2 hours.

Yields: 8-10 servings (unless you are a member of the Dieter family. Then it is closer to 6!)


I made this dessert the normal way since it was for co-workers, however, it adjusts beautifully for someone with dietary issues. A brand called Pamela's makes a awesome gluten-free baking mix that can take the place of Bisquick and Tofuti makes a really good dairy-free cream cheese. The result is almost indistinguishable from the original.

Happy Monday to you!!

Monday, April 19, 2010

Climbing up on my Quinoa soap-box

Brace yourselves... I really LOVE Quinoa and I can hardly believe it has taken me 4 1/2 months of posting before climbing up on my soapbox to preach about it!

If you are not already familiar with it, Quinoa (pronounced "keen-wa") is considered to be a grain, although technically it is a seed. The plant is a relative of of the dark, leafy green vegetables like Spinach and Swiss Chard. Because of this, it is super high in antioxidants. It is also considered to be a "complete protein" because it contains all nine essential amino acids. This makes it a great choice for vegetarians or even just for inclusion in a meal that does not contain meat. It is also a good source of fiber, easy to cook and very versatile. If I haven't already overwhelmed you with how amazing this little guy is, you can read more here.

Before Cooking...

After Cooking...

You can always purchase Quinoa at a health food store, but I have been seeing more and more regular grocery stores carrying it too. Cooking Quinoa is pretty simple. Almost everything out there will tell you to rinse it before cooking to wash off a bitter outer layer. However, I have never taken the time to do that and I think it tastes just fine. It cooks just like rice. Here in Colorado you would use 1 part Quinoa to 2 parts water or broth. At lower elevations I think it is closer to 1 part Quinoa to 1 1/2 parts water or broth. You don't have to boil the water first, but can put both the grain and water in the pot together, bring to a gentle simmer and cook until all the water has been absorbed (about 20 minutes, depending on how much you make).

There are gazillions of things to do with it once cooked. My favorite is to mix in a little butter, salt, parmesan cheese and toasted almonds. Last week I ate it for breakfast, topped with a slice of Swiss Cheese and an egg. This weekend I made a dish from the 101 Cookbooks website called Tabasco Asparagus Quinoa. In the past I have added cooked quinoa to a little bit of milk (regular, soy or rice) and sugar and topped with fresh strawberries. Or you could mix in a little brown sugar, some dried fruit and pecans and make it a breakfast cereal. I have seen (but not tried out) recipes where you stuff an acorn squash with cooked quinoa, sausage, cranberries, sage, etc and bake the whole thing in the oven. I saw another recipe once where you make a regular lasagna but instead of using noodles, you do a thin layer of Quinoa.

The possibilities are completely endless!!

Are you feeling inspired yet? I inspired myself with all my ranting. I am going to head to the kitchen for some Tabasco Asparagus quinoa salad for breakfast.

Happy Monday :)

Sunday, April 11, 2010

The makings of a vegetable garden...

Posts to this blog might be a tiny bit sparse over the next few weeks. My kitchen/cooking tantrum tapered off some time ago but life SUDDENLY got super busy and the frenzy does not seem likely to abate for at least 3 weeks. So I am still eating freezer leftovers for lunch and strange foods for dinner. It is amazing what you can come up with when you arrive home starving and start rummaging through the pantry.

But today's post is about what I did this weekend. It has more to do with top soil, organic cow manure, LOTS of digging, sore muscles, wood, nails and unexpected kindness than it does food. BUT... That is only because it is mid-April. By mid-June I am hoping it will have everything to do with all kinds of lovely fresh food!

A month or two ago, my friend Katie and I decided to participate in a community garden this summer. We are both utter beginners and decided to join up with a group called Pikes Peak Urban Gardens. This group facilitates community gardens where each family pays a small fee to lease the plot for the year. PPUG supplies quite a bit of the materials and seeds, we agree to donate a portion of what to grow to a charity/non-profit that helps the poor and then we have at it and get our hands dirty!

I won't go into all the gory details from this weekend, but Katie and I were grossly unprepared for the amount of planning and work that was going to go into turning what was a dirt parking lot into the framework for a garden. Within our space alone, Katie and I have 3, 8x4' beds, 3, 4x4'beds and 2, 6x3' beds. I am having serious misgivings about whether or not we will be able to maintain all this! But we are forging ahead anyway. After all the work from this weekend and all the work ahead of us, Katie and I were forcefully declaring that our children and their children WILL garden in this very spot and in these very beds! I gleefully mentioned that to one of the other gardeners and she very practically reminded me that pine boxes will rot from moisture and need to be replaced in 3-5 years. Darn!! My bubble was burst and I have not quite recovered yet.

Most of the work involved digging and building our beds. The building of the beds was an incredible puzzle. But in the space of 24 hours we were unexpectedly given several hundred dollars worth of wood and several hours of time from a handful of people who, I know very well, could have put their time to good use elsewhere! Their kindness and generosity was an incredible blessing! Below are a few pictures from our adventure. Nothing too exciting yet, but I have great hopes for all kinds of exciting things (ie: lettuce, spinach, broccoli, peppers, peas, beans, tomatoes, herbs, carrots, raspberries and alpine strawberries) soon! Stay tuned :)

Don't be fooled by these happy-looking faces. We were exhausted and a bit overwhelmed!


One bed built, seven more to go!!!


Katie's boyfriend, Nate, got a little trigger-happy with the nail gun!


7 additional beds finished and loaded into the truck... VICTORY!!!


My camera was a bit off center on this one. You can see my adorable friend plus my eye and cheek :)

Sunday, April 4, 2010

Popcorn for Dinner

So... After several cooking failures last weekend I had another failed cooking fiasco last Monday:


This was supposed to be a lovely Nutella-Swirl Pound Cake for my roommate's birthday but, as you can see, it didn't work out that way. After a very messy 1/2 hour scrubbing the sticky, burnt mess off of the oven baking racks, I threw a small tantrum and decided my kitchen and I needed a break from one another. So lunches last week were freezer leftovers and dinner was popcorn.

I really do love popcorn and although I don't usually eat as much of it as I did last week, I eat it and enjoy it regularly enough to share my "recipe" with you. I don't know if this really qualifies as a recipe, but it is the very particular way that I like my popcorn. I did not make this up. One of my roommates, Samantha, makes it this way and got us all forever hooked on it when we moved in together 3 years ago.

Popcorn Popper of some kind (Air popper or oil popper)
Dry popcorn kernels
Sriracha Hot Chili Sauce or Tabasco Sauce
Butter and salt to taste

I am not dainty about my popcorn eating and like to make about a 1/4 cup of dry kernels just for myself (maybe even a 1/3 cup if it is my whole dinner). This makes a pretty decent sized bowl. My generally healthy-eating self abandons ship when it comes to butter on my popcorn. I LOVE butter! I rarely eat the real stuff anymore, but I found a great substitute called Earth Balance that works beautifully on popcorn (and everything else for that matter). Whether you do real butter or a substitute, I like to do 2 parts kernels to 1 part butter. So if I use 1/4 cup of kernels, I will melt 1/8 cup of butter.

Pop the popcorn. Melt the butter. And now, for the secret ingredient. Add a few drops of Sriracha Hot Chili Sauce to the butter and mix well before pouring over popcorn. If you like the spice, add more. Otherwise just a few drops adds a nice, subtle, warm, garlicly, sweet chili flavor and it is WONDERFUL!

** If you don't have Sriracha sauce, regular Tabasco sauce is good too, although I am partial to the former. I am not sure if regular grocery stores carry the Sriracha sauce, but Cost Plus World Market has it and I am pretty sure that Whole Foods and Vitamin Cottage carries it as well.

I can feel my kitchen tantrum wearing off and I should be back to cooking later this week. But I am heading off as we speak to make one last popcorn dinner.

Happy Easter!