Thursday, July 28, 2011

My hardy little garden...

I've been meaning to take pictures of my garden for several weeks and just kept forgetting to bring my camera over to Jeff's house.

And then, two weeks ago, it did this:


I thought for sure my little garden would be trashed!

But it is hardier than I thought... Just two weeks later, it looks like this:


I planted Zinnias throughout the garden and they are popping up and bringing color and making me very happy!


I planted mini cucumbers because I want to make dill pickles. The plant has gone CRAZY and I probably have close to a hundred of these little guys starting to form. I'm going to have pickles coming out my ears! (Not literally...)


I know its hard to see, but this is my cucumber vines in the back, chives, onions, rosemary, basil and cilantro.


Lettuces...


Brand new strawberry plants that I just put in to replace some sugar snap peas that died, radishes that we ate and carrots that didn't come in well...


This picture does not do my tomatoes justice. They have turned into 3 beasts! I planted them too close together and am having to prune them back almost every weekend because they are growing so fast and there isn't room to just let them go. You can't see it in this pic, but the center plant (cherry tomatoes) are already ripening. Of course, we're nibbling on them as fast as they ripen. Its a full-out competition between us and the squirrels...

And there's the update I've promised a few of you.

Happy Thursday :)

Tuesday, July 26, 2011

Love People. Cook them tasty food.

So, remember how yesterday in my post I wrote that cooking for people is part of how I show love?

Guess what they GAVE me when I was in Penzey's Spice shop yesterday? (I didn't even buy anything. Was just browsing...)


Is that an awesome magnet or what? I had just seen one like it at a friend's house and wondered where she got it.

I love Penzey's!

And my refrigerator full of faces that I love.

And the little note below my shopping list from Stacey when she came to get the curling iron of hers that I've had for 2 months!

Monday, July 25, 2011

Bittersweet Chocolate Pudding Pie

I've gotten several semi-confused comments recently about my continuing to bake things that I cannot currently eat... I know it sounds weird, but it is still super fun for me to try things out and test them on people, even when I can't eat them myself. And it continues to be a way that I tell people, "I love you and it makes me happy to feed you".

That said, my man told me recently that I am going to make him fat if I keep testing my desserts on him, so I saved up this new recipe for a get-together with my old roomies:


Aren't we cute?? I love these girls! So I made them some Bittersweet Chocolate Pudding Pie...

If you have people in your life that you are feeling some love for, you could make them some Bittersweet Chocolate Pudding Pie too! I took lots of pictures this time, so get ready!

Bittersweet Chocolate Pudding Pie
(From Bon Appetite Magazine)

CRUST:
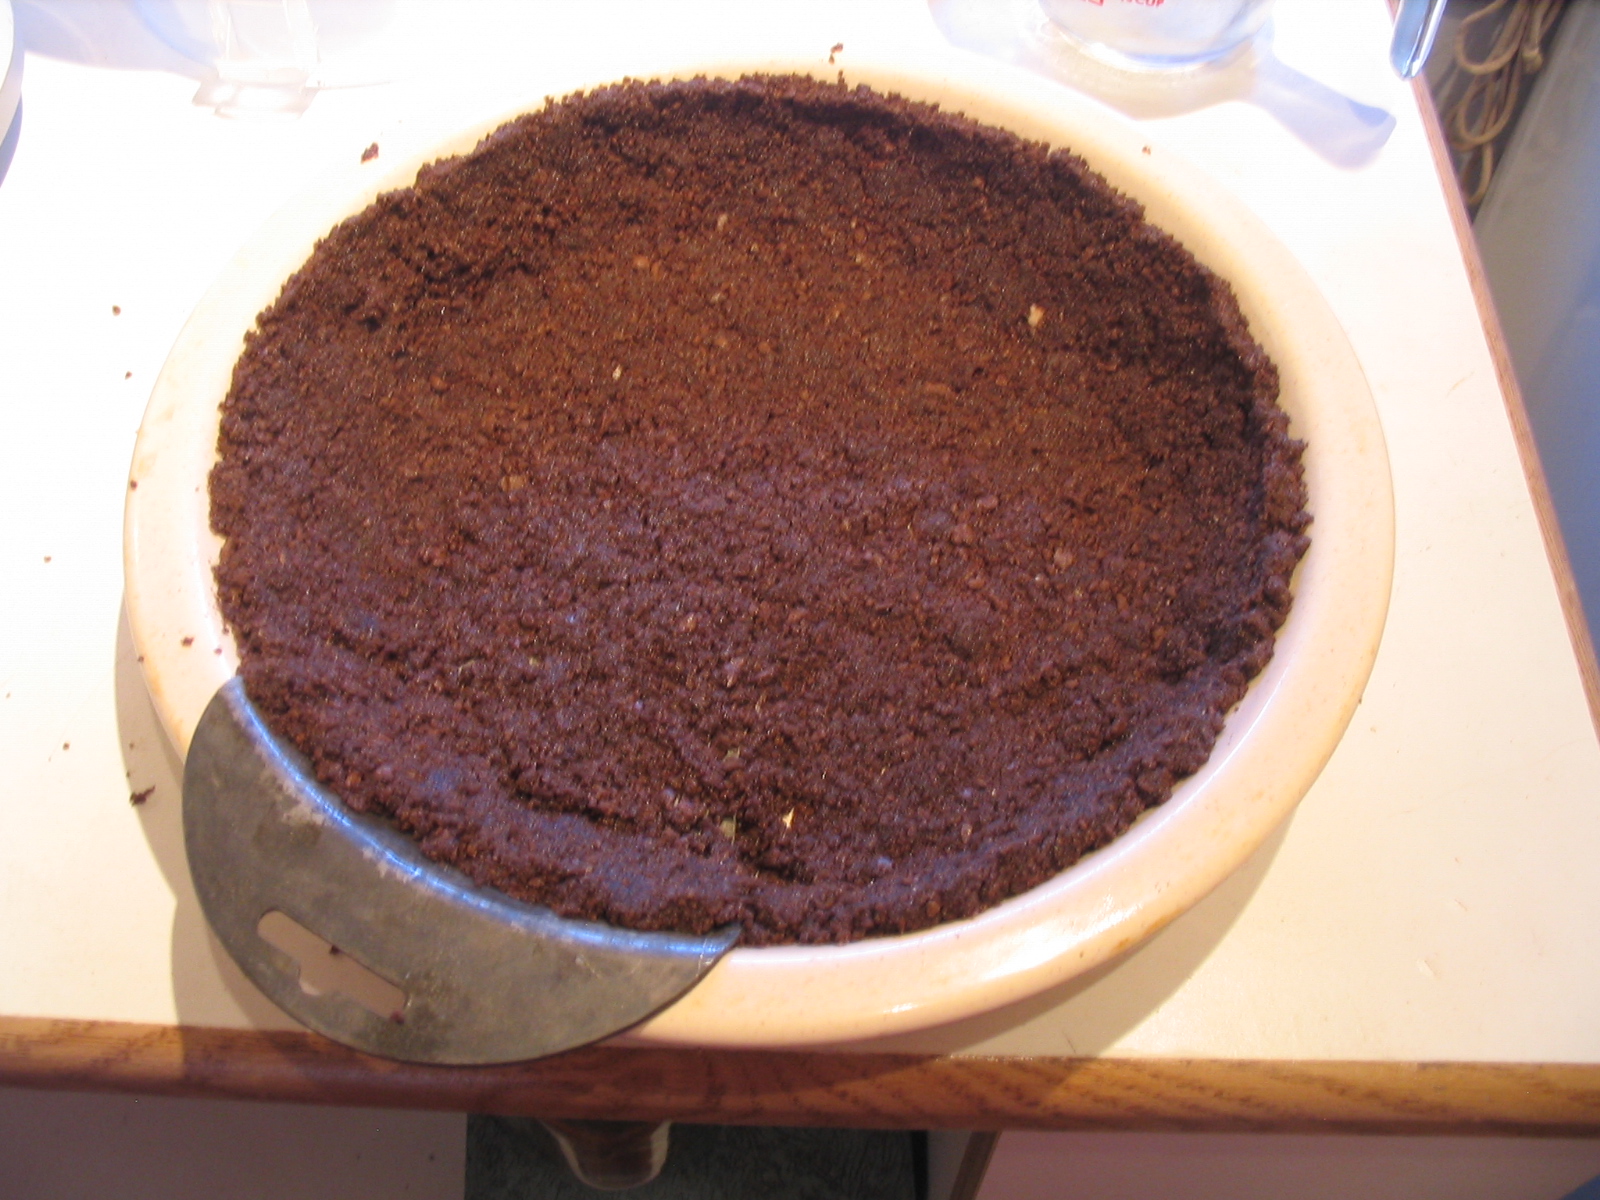
1 cup. chocolate wafer cookies (about 1/2 of a 9oz box)
2 T sugar
5 T butter, melted
2 oz bittersweet chocolate (60% cacao), finely chopped

- Pre-heat oven to 350 F.
- Pulse cookies and sugar in food processor until finely ground. Mix with melted butter and press into a 9-in pie dish.
- Bake for 12 minutes and remove from oven.


- Sprinkle chocolate over crust and let sit for about 2 minutes.


- When melted, spread in an even layer over the bottom.


- Cool completely and refrigerate until set. (My old roomie, Sami, said she thought this kept the pudding from making the bottom of the crust soggy. She is super smart!)

FILLING:
1/3 c. sugar
1/3 c. unsweetened cocoa powder
2 T cornstarch
1/8 tsp salt
1 3/4 c whole milk, divided
1/4 c heavy whipping cream
4 oz bittersweet chocolate (60% cacao), finely chopped
1 T dark rum
1 tsp vanilla extract

- Mix sugar, cocoa, cornstarch and salt in a heavy saucepan. Turn on medium heat and whisk in 1/3 c milk. Continue whisking until mixture thickens to almost a paste. Add remaining milk and cream. Stir constantly for about 5 minutes until mixture just begins to bubble and thicken into a lovely chocolate pudding. Add chocolate and stir until smooth.
- Remove from heat and add vanilla and rum.
- Pour into pie crust and refrigerate overnight. (Or... Get up in the morning and make your pie and just be sure it gets a solid 6-8 hours in the fridge)


Top pie with Cool Whip or homemade whipped cream and chocolate shavings or chips. The original recipe called for a Creme Fraiche topping, but I ran out of $$ at the grocery store and happen to think that plain ole' Cool Whip is pretty awesome.

Remove the pie from the fridge a good 30 minutes before eating so that the chocolate layer on the bottom can soften slightly. This will make it easier to slice.


And there you have it! Feedback on the pie was that it was nice and light and super yummy, but really not sweet at all. So if you are a dark-chocolate kind of person, this is the pie for you! But if you have to be one of "those" milk-chocolate kinds of people (yes, there was a tiny bit of snobbery in that comment...), you might want to increase the sugar in the pudding. (I dipped the corner of a fork prong into the pudding part and tasted the tiniest bit and thought it was just right).

Hope you enjoy!

Tuesday, July 12, 2011

2011 Manitou Springs Pie Baking Contest

Yes, I did it... I entered my second ever pie-baking contest yesterday! The first was when I was 13 or 14 or so and I entered an Apple Pie in the Los Angeles County Fair. It was tied with another pie for first place and so to break the tie, the judges gave the award to the other pie because it had a top crust and that is more difficult. But the judge asked for my recipe. (16 years later, my dad still likes to brag about that!)

This year I entered a Vermont Maple Peach Pie in the 2011 Manitou Good Ole Fashion Ice Cream Social and Pie Baking Contest. How is that for a long title? I posted this recipe last year but made a few changes and learned a good lesson while baking yesterday:

1. I used a Pate Brisee crust recipe, in an attempt to get the sliced piece to look pretty. It turned out great!
2. I used 1/4 cup Quick Cooking Tapioca in place of cornstarch and the filling thickened up BEEE-AUTIFULLY. I highly recommend this if your fruit pies tend to turn out runny.
3. I brushed the top of the pie with butter and sprinkled it with cinnamon sugar. This was the wrong thing to do. Too much butter! (I know... You were wondering if such a thing is possible. It is!) The butter made the top surface look funny and it pooled a little in the midding and worst of all, it started to drip in my oven and then burn and smoke. Ugh.... I spent an hour getting heat-blasted in the face while swapping out foil every 10 minutes or so to keep the smoke alarms from going off. That was the least fun part of my day yesterday! So if you make this crust recipe brush the top with a little milk or some egg and then sprinkle the cinnamon sugar.


I did not win the contest but I had a great time! There were some beautiful pies and some lovely people. I was told by a contest veteran that the "pretty" pies typically win over the "tasty" ones. I'm already scheming up how to make a prettier pie next year!

My good friends Tarah and Chris came to cheer me! (Remember THIS?? Yes, one and the same!) Chris is a professional photographer and she snapped some shots of the fun and put them on her blog. You can take a peak HERE. And just to say it, her photos are amazing! If you know anyone in need of a wedding or other special event photographer, send them her way!

Happy Tuesday :)

Saturday, July 2, 2011

Jenny's Mint Mojitos

Have you ever grown mint? If you haven't, let me give you a tip... Make sure you have a plan for how to use it before you put it in! This stuff morphs from a fairly normal-looking little plant into a total planter-conquering beast in just a couple of weeks!

My "mint plan" consisted of hanging out with my man on his patio during the summer evenings and sipping mint mojitos. Sounds nice, right? (It was!)

This is my favorite summer cocktail. And lest you think I am more sophisticated than I actually am... I should probably confess that this is also the only summer cocktail that I know how to make. But I am hoping to make THIS soon and try my hand at some spiked strawberry lemonade! Or maybe I'll do peaches instead of berries and make a hard peach iced tea... Yum!


Here you go:

Jenny's Mint Mojitos
(adapted from several online versions)

Mint Simple Syrup
1 cup water
1 cup sugar
1 cup mint leaves

Bring water and sugar to a simmer, stirring until all sugar dissolves.
Remove from heat, add mint leaves and steap, covered for 30 minutes.
Strain out mint leaves and store syrup in a covered jar in the refrigerator


Mint Mojito (1 serving)
1 1/2 oz mint simple syrup
5-10 mint leaves
1 1/2 oz fresh squeezed lime juice
1 1/2 - 2 oz rum (Increase this at your own risk... One of the first times I made these, I couldn't taste the rum and so decided to add more... I didn't feel tipsy but I walked into a wall trying to make it back inside from the porch! More than a little bit embarassing! Now I stick to a firm 2oz max.)
About 5-6 oz sparkling water or ginger ale
Crushed ice

In a glass, add the simple syrup, mint leaves, lime juice, rum and crushed ice. Muddle together with a spoon. Top off with sparkling water or ginger ale. (I always use ginger ale).

If possible, go find the man that you love and hang out on the patio and enjoy a summer evening sipping away!